Use JavaScript to generate multiple pages with shared components
In this chapter, you create a second page, and move the parts that are the same for both pages into shared components. You use a bit of server-side JavaScript to do that.
Introducing JavaScript
Section titled “Introducing JavaScript”On your published website, open your browser’s developer tools again. But this time, switch to the tab named Console.
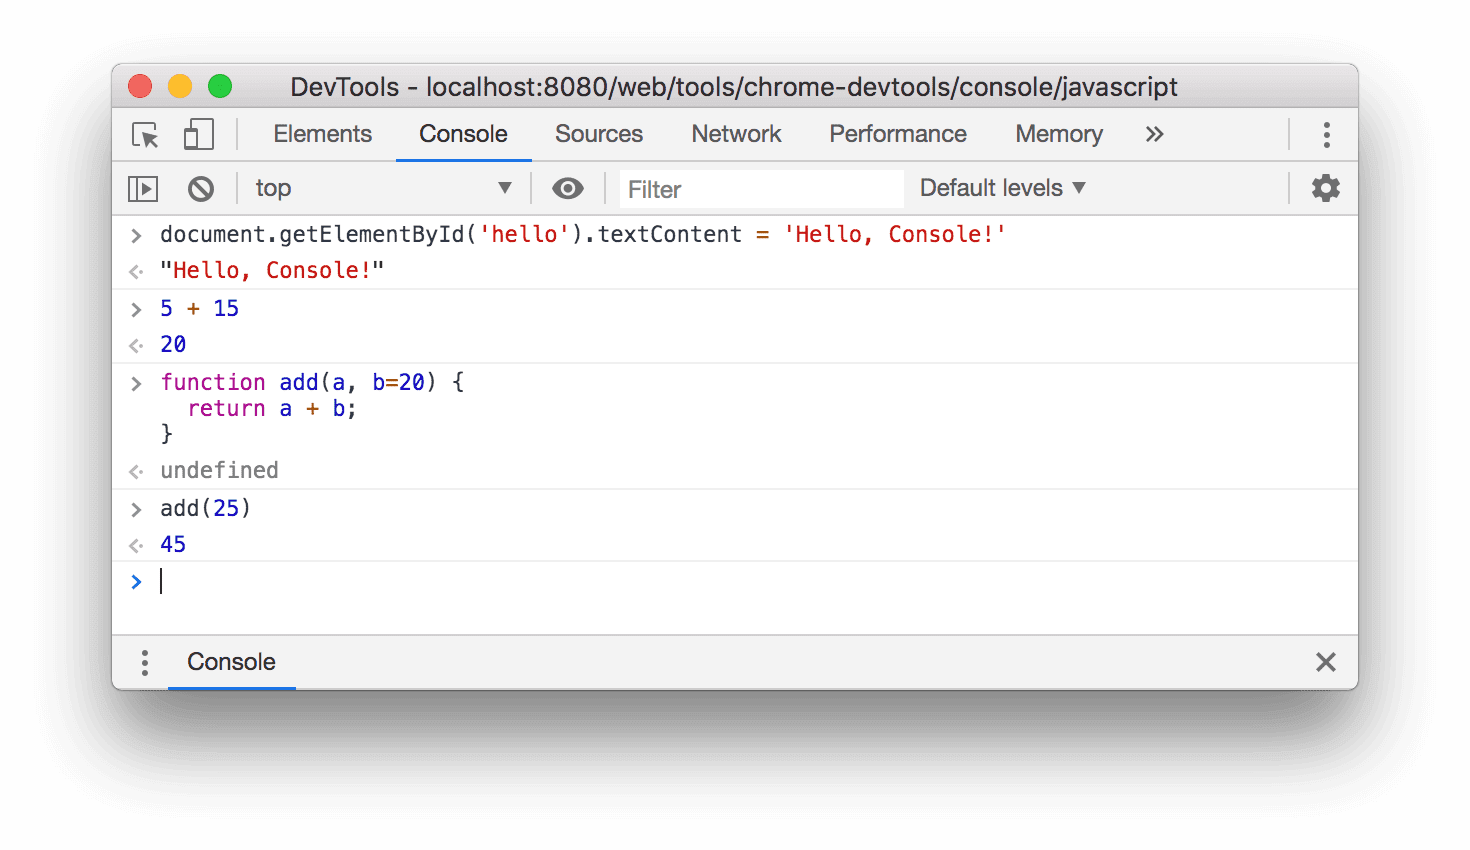
This is an interactive JavaScript console, which means that you can type in JavaScript, hit enter, and it will calculate the result. Try adding two numbers by typing:
1 + 2After hitting enter, a new line will be shown with the result: 3.
A piece of text, that a program works with, is called a string. In JavaScript, strings are usually wrapped in either single quotes or double quotes. Type:
'1' + "2 cats"and hit enter. It returns "12 cats" (this time with quotes). That’s because when working on strings (as opposed to numbers), the + operator concatenates them together.
If you want your program to remember something for later, assign it to a variable. Create the variable myName and assign it the string "Peter" by typing:
const myName = "Peter";The semicolon at the end is customary to mark the end of a statement. Statements (as opposed to expressions) will not directly give a result – that’s why it prints a line saying undefined.
A third way to write a string is to wrap it in backticks. This allows you to put variables (and other expressions) in it using ${ }:
`I am ${myName} and ${3 * 10} years old`If you want to execute the same kind of computation multiple times, you need a function. One way to write a function that returns the string "Hello World", and assign that function to the variable hello is:
const hello = () => "Hello World";Again, assignments always return undefined. But now you can call the function:
hello()which will return the string "Hello World".
To make it a bit more useful, we can write a new function that takes an argument, which you can name as you wish. Let’s call our argument name:
const helloName = (name) => `Hello ${name}`;You can call it like:
helloName("Peter")Finally, let’s give you a sneak peak on JavaScript objects (which hold key-value pairs):
const person = { firstName: "Arthur", lastName: "Dent", age: 42 };`${person.firstName} ${person.lastName} is ${person.age} years old.`And arrays, which act like lists:
const shoppingList = ["bread", "milk", "butter"];const rememberFn = (item) => `Remember the ${item}!`;shoppingList.map(rememberFn).map() calls the method map on the shoppingList. A method is a function attached to an object. All arrays come with a map method. When you call it, you need to give it a special kind of argument: a function.
Feel free to toy around a bit more in the JavaScript console. You can always reload the page to reset everything, meaning you’ll lose all your variables.
The good news is that with JavaScript – like with any general-purpose programming language – you can create arbitrarily complex programs. That’s also the bad news btw. Either way, this crash course should be enough for you to create that second page for your website.
A second page
Section titled “A second page”So far your website still consists of only a single page: the home page. Add a second page by creating a new file: routes/news.html. You could add the same header and footer all over again in this second file. But the more pages you add, the more tedious this approach becomes. And when you modify the header or footer in one file, it’s easy to forget changing all other files. The solution is to move the header and footer to their own reusable components.
Components
Section titled “Components”-
Create a new folder
componentsin the root of your project (i.e. not inside, but on the same level as theroutesfolder). -
Move the
<header>and its contents to a new filecomponents/Header.jsand wrap it in a bit of JavaScript:
import { html } from 'mastro/html.js';
export const Header = () =>  html`    <header>      <div>My awesome website</div>    </header>  `;
There are a few things going on here:
- The first line imports the
htmlvariable from themastropackage. - The next part assigns a new function to the variable
Helloand exports it. You need toexportvariables, if you want to use them in other files. - A component in Mastro is just a function. However, its name is capitalized by convention (
Headeris the name of your component above). - The functions returns a string (everything between the two backticks). But not just any string. We’re using the
htmltagged template (that we imported on the first line) to escape things properly.
Analogous to Header.js, create a second file:
import { html } from 'mastro/html.js';
export const Footer = () =>  html`    <footer>      <div>        Check us out        <a href="https://github.com/mastrojs/mastro">on GitHub</a>.        © ${new Date().getFullYear()}      <div>    </footer>  `;
Notice the use of the ${ } syntax inside the template literal to place the result of arbitrary JavaScript expressions right there.
Now, to import the two functions we just created, you first need to convert the home page from a HTML file to a JavaScript file.
JavaScript page handlers
Section titled “JavaScript page handlers”Rename the routes/index.html file to routes/index.server.js and change its contents to:
import { html } from 'mastro/html.js';import { htmlToResponse } from 'mastro/routes.js';import { Header } from '../components/Header.js';import { Footer } from '../components/Footer.js';
export const GET = () =>  htmlToResponse(    html`      <html>        <head>          <title>My website</title>          <link rel="stylesheet" href="styles.css">        </head>        <body>          ${Header()}
          <main>            <h1>What is Structured content?</h1>            ...          </main>
          ${Footer()}        </body>      </html>    `  );
First, we import two functions from Mastro, and the two components you just wrote.
Then we create a new function called GET, and export it. While you can call components whatever you want, the function you export from a routes/*.server.js file needs to be named GET. Otherwise it’s not called when your server receives a HTTP GET request from the browser for that page.
All the above GET function does is to call the htmlToResponse function with one very long argument: the html tagged template string with all your HTML. The htmlToResponse turns your HTML string into a JavaScript Response object, which represents an HTTP response. When the browser makes an HTTP request to your web server (or GitHub Pages in this case), the server replies with that HTTP response.
Finally, Header() calls the Header function, and the result of that is placed with the ${ } syntax.
Load the page in the Mastro preview to see whether it still works!
A Layout component
Section titled “A Layout component”Now you’re almost ready to create that second page. Just one more thing to move to its own component file, because we want to reuse it: the skeleton of the page, often called Layout. Create a new file:
import { html } from 'mastro/html.js';import { Header } from './Header.js';import { Footer } from './Footer.js';
export const Layout = (props) =>  html`    <html>      <head>        <title>${props.title}</title>        <link rel="stylesheet" href="styles.css">      </head>      <body>        ${Header()}
        <main>          ${props.children}        </main>
        ${Footer()}      </body>    </html>  `;
The above component is still just a function, but a function that takes one argument: the props object (short for properties).
Now you can reduce your routes/index.server.js file to:
import { html } from 'mastro/html.js';import { htmlToResponse } from 'mastro/routes.js';import { Layout } from '../components/Layout.js';
export const GET = () =>  htmlToResponse(    Layout({      title: 'Home',      children: html`        <h1>What is Structured content?</h1>        ...        `    })  );
Note how we pass an object of the form { title, children } as an argument to the Layout function when calling it. That’s the props object.
Now finally all that work pays off: add that second page by creating a new file:
import { html } from 'mastro/html.js';import { htmlToResponse } from 'mastro/routes.js';import { Layout } from '../components/Layout.js';
export const GET = () =>  htmlToResponse(    Layout({      title: 'News',      children: html`        <p>Once we have news, we'll let you know here.</p>        `    })  );
To test whether that page works, enter /news in the address bar of the Mastro preview pane and hit enter.
Whenever you change anything in components/Layout.js, both pages will be updated!