Introducing HTML
In this chapter, you build your very first page.
Your first website
Section titled “Your first website”The simplest website is a single HTML file. In Mastro, each file in the routes/ folder results in one or more files publicly accessible on your website.
-
Create a new folder
routes: when hovering over the name of your repository on the left side-pane, four small icons should appear. Click the second one from the left (a folder with a plus in it), typeroutes, and hit enter. -
Create a new file
index.html: with theroutesfolder still selected, this time click the leftmost of the four small icons (a sheet of paper with a plus icon in it), typeindex.html, and hit enter. -
The file opens on the right. Type (or copy-and-paste) the following HTML in it:
routes/index.html <!doctype html><html><head><title>My website</title></head><body>Hello world!</body></html>
Hit Ctrl-Shift-P (Windows or Linux) or Command-Shift-P (Mac), type mastro, and when the mastro: Preview and Generate Website item appears, hit enter. This opens the Mastro preview pane.
This will open a new tab to the right, displaying your index.html file, just like it would show in a web browser tab. Note how the text in the <title> is shown as the tab name, just like it would be in a browser’s tab. The body is the part of the HTML file that is visible as the page itself.
Content first
Section titled “Content first”When creating a new page, always start with the HTML. It’s the foundation. Later you can add CSS to make it look nice, and maybe JavaScript to make it interactive. But always start with the content. Let’s add some:
<!doctype html><html>  <head>    <title>My website</title>  </head>  <body>    <h1>Common HTML elements</h1>    <p>      Let's go through the most important HTML elements to      structure your content:    </p>
    <h2>Paragraphs</h2>    <p>The p element marks a paragraph of text.</p>
    <h2>Headings</h2>    <p>      At the very top of the body, we have the heading of this page      in an h1 element. This is what search engines (like Google)      and screen readers (used by visually impaired readers) look for      when they want to know what the page's title is. Therefore, you      should only ever have one h1 element on any given page.    </p>    <p>      The h2 element is a sub-heading. HTML has h1 up to h6 elements,      to mark progressively deeper nested sub-headings. You should      use those to mark the structure of your page. All headings      together should act like a table of contents for your page.    </p>
    <h2>Lists</h2>    <p>      Let's add an ordered list      (meaning the list markers will be numbers):    <p>    <ol>      <li>list item one</li>      <li>list item two</li>      <li>list item three</li>    </ol>    <p>      and an unordered list      (the list markers will be bullet points):    <p>    <ul>      <li>list item one</li>      <li>list item two</li>      <li>list item three</li>    </ul>
    <h2>Formatting</h2>    <p>      Note how all elements introduced so far cause a line-break      before and after them? That's because they are so-called      <a href="https://developer.mozilla.org/en-US/docs/Glossary/Block-level_content">block elements</a>.    </p>    <p>      However, links (like the a element we just saw),      <em>emphasis</em> (rendered as italics), and      <strong>strong emphasis</strong> (rendered bold),      are all inline elements. That means they don't cause      any line-breaks by default.    </p>
    <h2>An image</h2>    <img src="chair.jpg" alt="A chair" height="300">    <p>      We will add an image file <code>chair.jpg</code> later.    </p>    <p>      For now, note the alt attribute on the image. It is required      and contains "alternative text" that is read to visually      impaired readers, or shown if the image fails to load.    </p>    <p>      If the image is relevant content, the alt text should      therefore be a brief description of what's in the image.      If the image is just decoration, you should use alt="".    </p>  </body></html>
Copy-and-paste that, replacing the current contents of your index.html file and see how the preview on the right renders it. That rendering – converting the HTML to pixels on the screen – is all done by your browser.
Notice how we’ve indented each HTML element that’s nested with two more spaces than its parent element? While not strictly necessary, it’s considered good practice to do so (some people use four spaces or tabs instead). It may seem tedious in the beginning. But if you don’t do it and just add more and more text, eventually you’ll lose sight of which elements are nested in which ones, and you’ll curse yourself for wondering why all your text is too big, only to discover 15 minutes later that you just forgot that closing </h2> somewhere at the beginning, for example.
Images on the web
Section titled “Images on the web”Probably you’ve noticed that the image on our page is broken. That’s because we haven’t added an image file yet. You can find an image of a chair, or some other image, and add it by dragging-and-dropping it into the routes/ folder. Make sure the name of the file is the same as what you have in the src attribute of the img element in your HTML.
Alternatively, you could also change the src attribute to point directly to an image somewhere on the web. However, if that third-party removes the image from their website (or moves it to a different location), your website will lose the image.
The image should not be too large for your website to load quickly – even on a slow mobile network. If it fills the whole page width, less than 500kB is usually good. For photos, JPEG images work okay. For small icons, or images with a lot of text, PNG usually works better. However, if you can figure out how to export your image in the WebP format, do that instead. Of the formats supported in all modern browsers, WebP produces the smallest file size. One final exception: if your image is a vector graphic, then use the SVG format.
Publish your website
Section titled “Publish your website”To publish your website to the internet, we need to:
- Enable GitHub Pages on your GitHub repository (this only needs to be done once)
- Generate the static site (this creates a new
docs/folder) - Save changes to GitHub
One-time setup
Section titled “One-time setup”Configure GitHub Pages to make the docs/ folder of your repository accessible as a website:

- On GitHub, navigate to the page of the repository you created in the previous chapter:
https://github.com/your-user-name/your-repository-name/ - Click the Settings tab on the top right (possibly hiding in a
...menu). - In the Code and automation section of the sidebar, click Pages.
- Under Source, make sure that Deploy from a branch is selected.
- Under Branch,
- switch the branch from
Nonetomain, - switch the folder from
/ (root)to/docs, and - click Save.
- switch the branch from
Generate the static site
Section titled “Generate the static site”In the Mastro preview pane on the right (which previews your website), click the Generate button in the top-right corner. After a slight delay, the Output panel should fade in from the bottom and inform you that mastro built the entire static website (or if anything went wrong). Feel free to close that panel again – it will reappear every time you click the Generate button.
The HTML files are generated in the docs/ folder, which you should now see in the Explorer view on the left, just above your routes/ folder. You can look at the generated files in the docs/ folder, but don’t edit them, as they’ll be overwriteen the next time you click Generate.
We’re using the docs/ folder, because that’s the only folder name GitHub Pages allows. (If you know GitHub Pages, you may be wondering why we’re not automatically pushing to the gh-pages branch. That’s because at the moment, it’s not possible for a VS Code for the Web extension to directly interact with git.)
Since your website currently only consists of a single static HTML file, all the static site generation did was copying over the index.html file from the routes/ to the docs/ folder. Rest assured, this feature will become more useful in the future.
Save changes and publish to the web
Section titled “Save changes and publish to the web”So far, we haven’t saved any of the changes we made. To do that, switch to the Source Control view in the activity bar on the left.
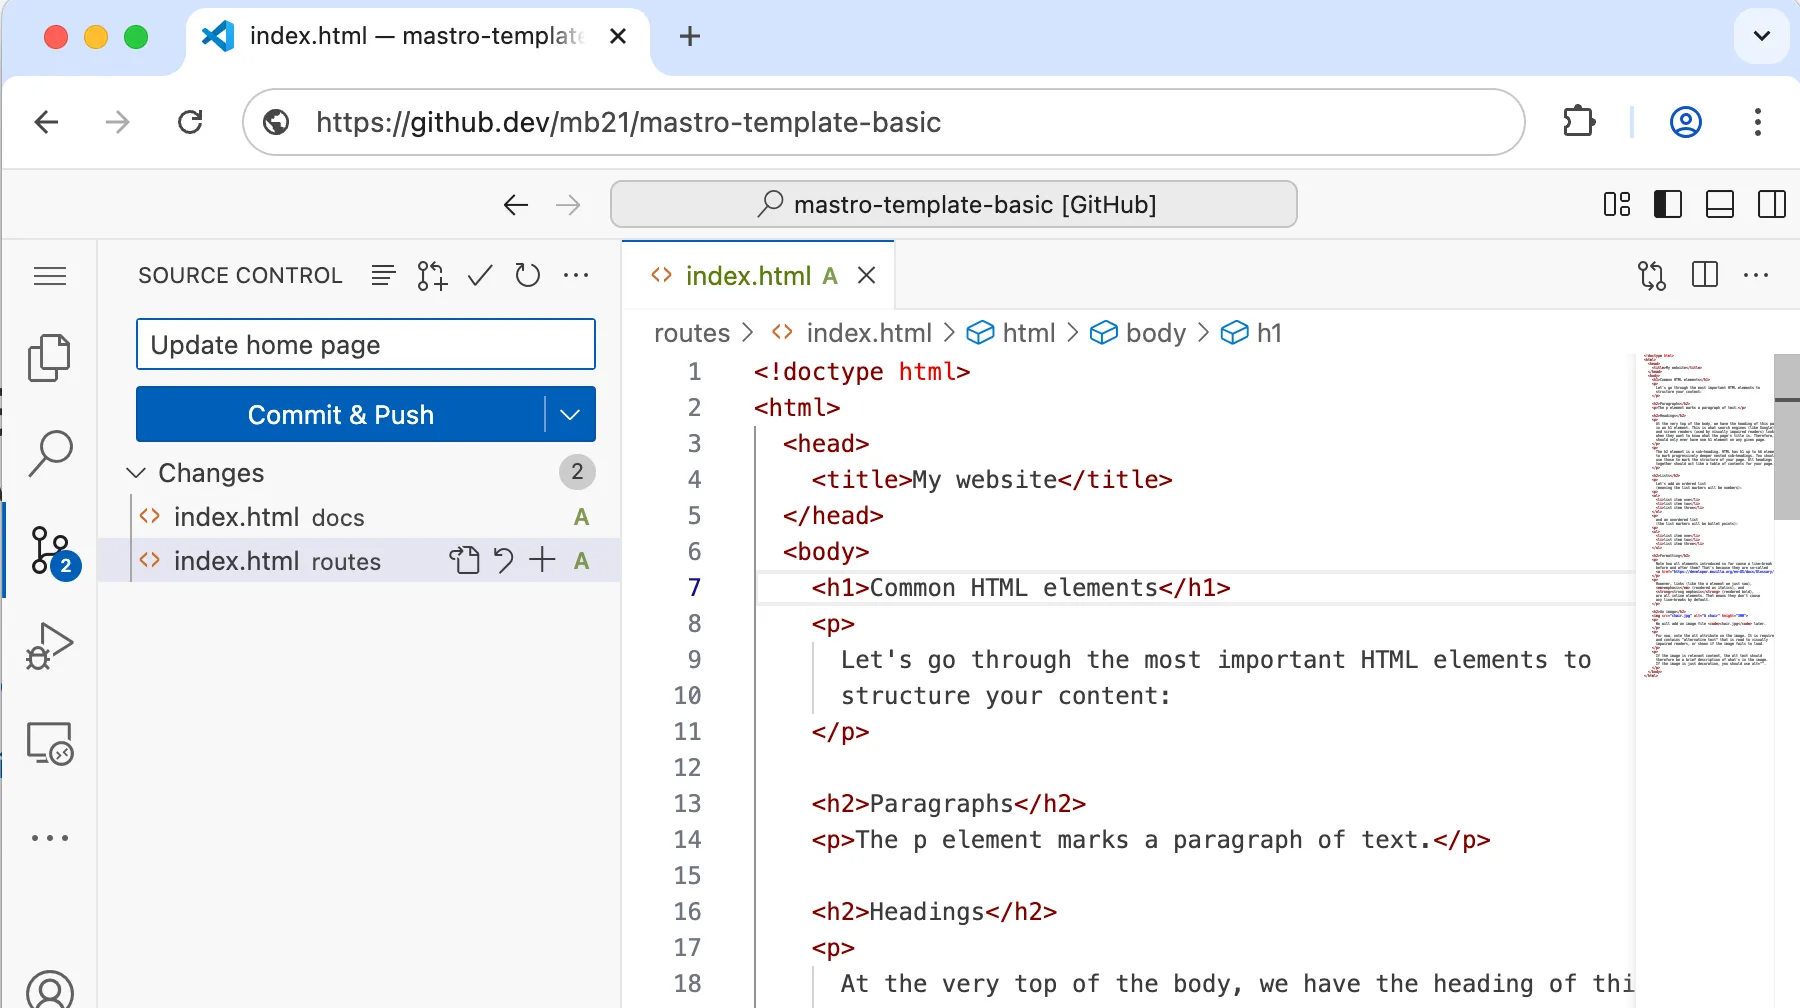
The first time, a blue box might be there with the text:
Your changes will be committed and immediately pushed to the ‘main’ branch on GitHub.
You can click Don’t show again. Below, you should see a list of changed files:
docs/index.htmlroutes/index.html- And if you’ve added an image, also
docs/chair.jpgandroutes/chair.jpg.
To save these changes to your repository on GitHub:
- Enter a message in the text field. For example
Update home page. - Click the blue Commit & Push button.
In your browser, go to your repository’s page on GitHub and verify that the changes are there: https://github.com/your-user-name/your-repository-name/
On that same GitHub page, in the horizontal grey bar above your files and folders, you should see the message you just entered. And just on the right of your message, there should be a green tickmark, indicating that the docs/ folder was successfully deployed as a website. If it’s still a yellow dot, you need to wait a few more seconds.
To visit your website, open a new tab in your browser and go to:
https://your-user-name.github.io/your-repository-name/If you’re unsure about the link to your website, you can find it where you previously set up Github Pages: Click the Settings tab in the top right -> Pages -> Visit site.
Congratulations on publishing your website!